Rational Quality Manager has a huge number of options. Paring that back to make a simpler tool is possible, and I am going to look here at some of the configuration options.
 From the Settings menu at the top right, the gear wheel, I will go through some of the important parts of the Project Properties and the Artifact Templates, and Manage this Project Area.
A thorough look at all the items accessible from here will give you many hours of entertainment and wondering at exactly what you have done. Please play with these on a sandbox project before trying them in production.
 First the Manage Project Properties option. You can see from the image here that there are a lot of options and I am going to ignore most of them. This is not because they have no value, but because i am picking out the items that will give the best chance of implementing a simplified project, quickly.
Some of these items do nothing out of the box and require you to add in complexity in the form of options or data. This is great if you want the tool to do more, but if you want a simple example then it is best to leave them alone.
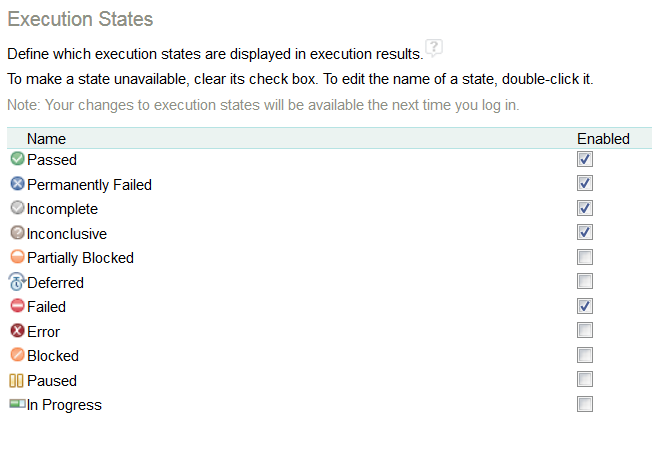 The first item on this menu that I want to look at is the Execution States.
When you run a manual test you have options of setting each step as Passed or Failed. There are also a number of other states that can be set, and the list can be filtered here, so that only the selected options are shown.
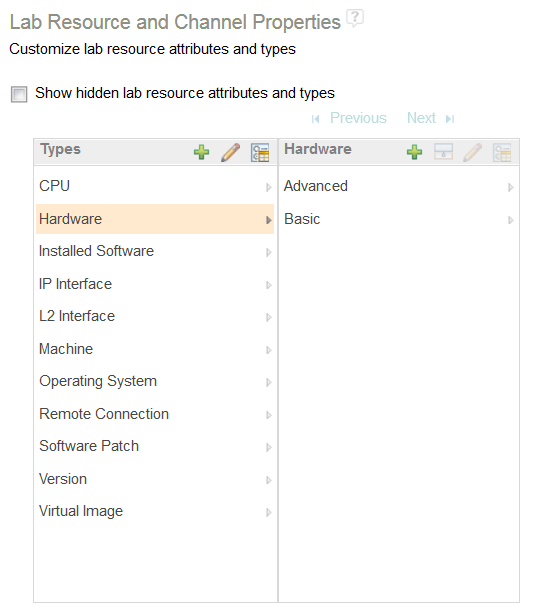 Next is the Lab Resource and Channel Properties. When you create a Test Environment, a number of options appear such as CPU and Operating System. This is where you set your values for those, and also where you add other Types. For a hardware project, you may want to run tests on both the Advanced and the Basic versions of the hardware. This is not an out of the box resource type, but one that I have added in.
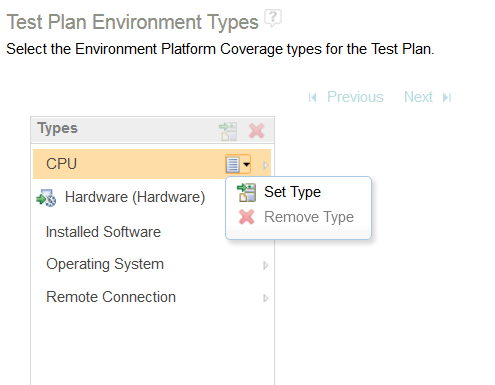 The Test Plan Environment Types allows you to switch on or off any of the resources that were configured in the Lab Resource and Channel Properties. This will be particularly important for systems projects where the test team will be frustrated by an obviously IT oriented set of test environment options. Here you can select all of the relevant items and remove the others from view within the project.
 The Artifact Categories section of this page allows you to remove the preset options of ‘Product’ and ‘Release’ from the summary sections of the various artifacts. If you remove those and do not replace them, then no ‘Categories’ section will be present in the artifacts. If you want those options then this is where you add in the appropriate values. If you want something different, then create it here.
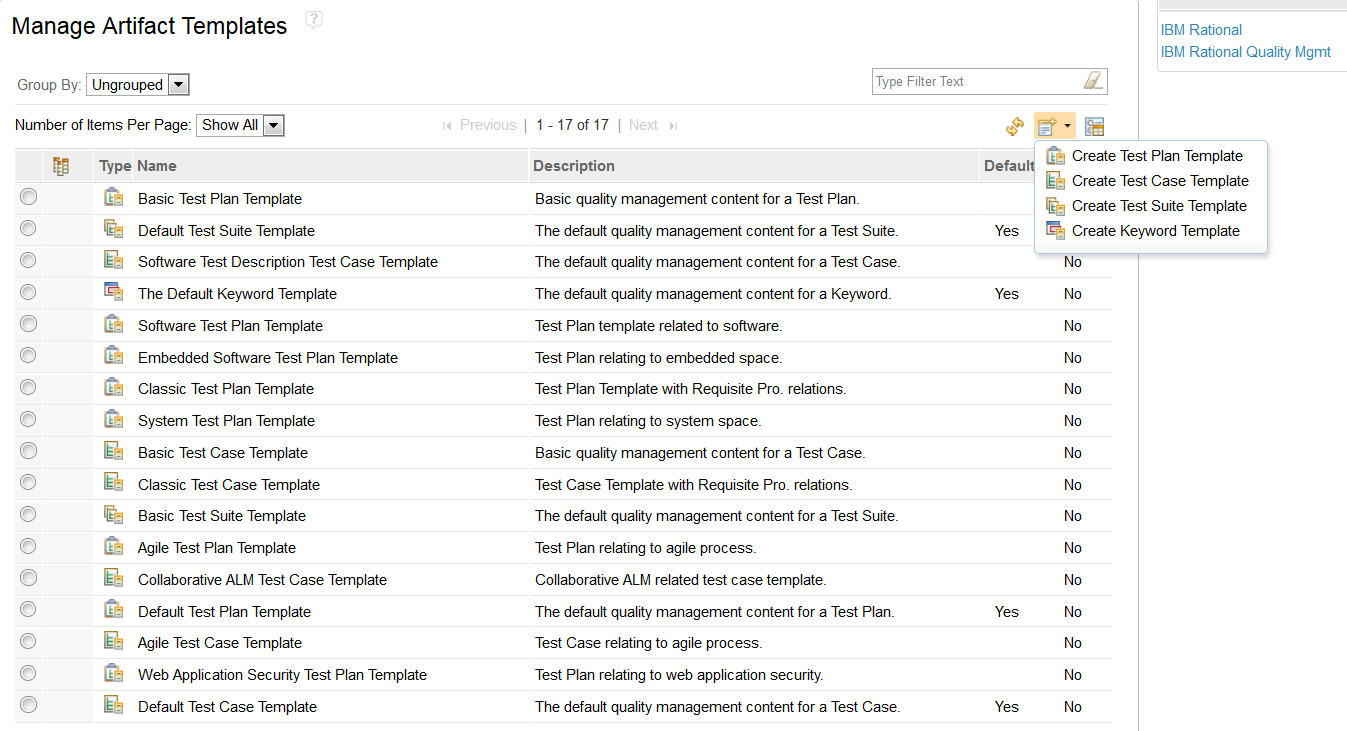 Back to the top level and now look at Manage Artifact Templates.
Here you see all the templates for the artifacts such as Test Plans, Test Cases and more. You can set a default for each type of artifact and from the button top right you can create a new template.
 When you select ‘Create Test Plan Template‘ a dialog appears to configure the sections that you want in the Test Plan. This can be stripped back to very little, or fleshed out with a great deal of detail including custom sections. Once created, this will appear in the list for Manage Artifact Templates, and can be set as the default.
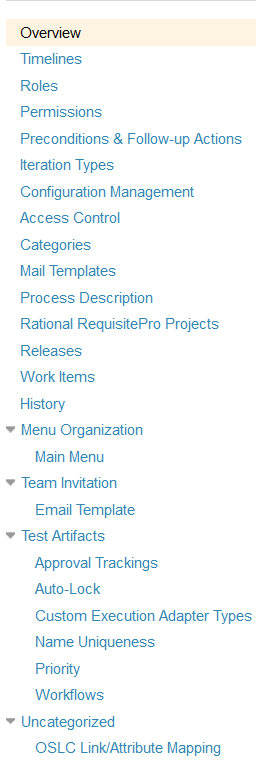 The next top level menu that I want to look at is ‘Manage This Project Area‘.
There is a long list of items in this menu. Some are looking at workflow and work items, some are to do with Roles, and other are looking at timelines and releases. There is a lot here, and again, much fun to be had in a sandbox environment, but please be careful in a production project.
I am only going to look at two items from this menu as I am looking at simplifying over what is out of the box functionality.
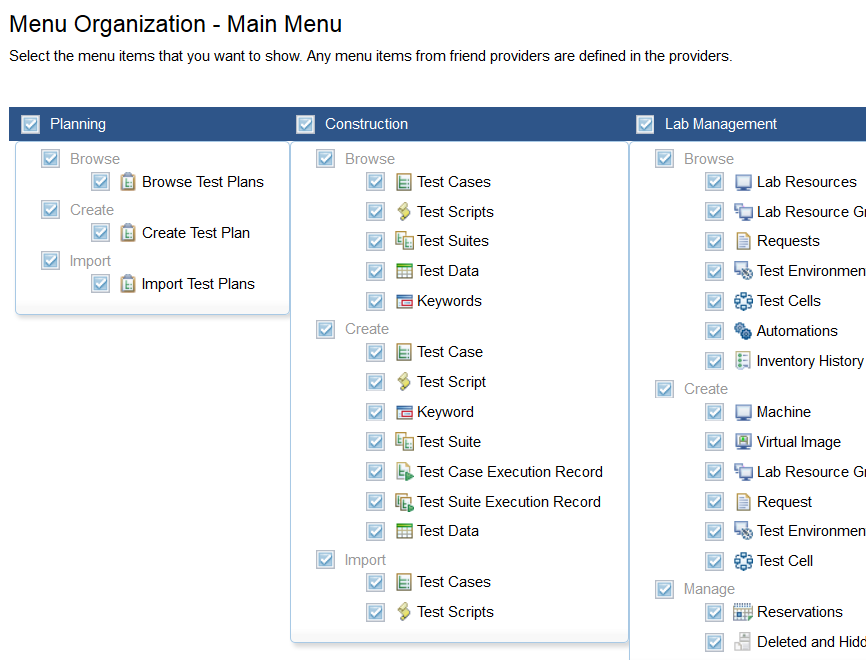 The first item here is the ‘Menu Organization – Main Menu‘.
This is a really useful option when it comes to simplification. You can turn off individual menu items for the project. If you aren’t using Lab Management, you can take it away from the menus for the project. Be careful not to turn off items that you need, but do take a careful look at this and remove the items you won’t be using.
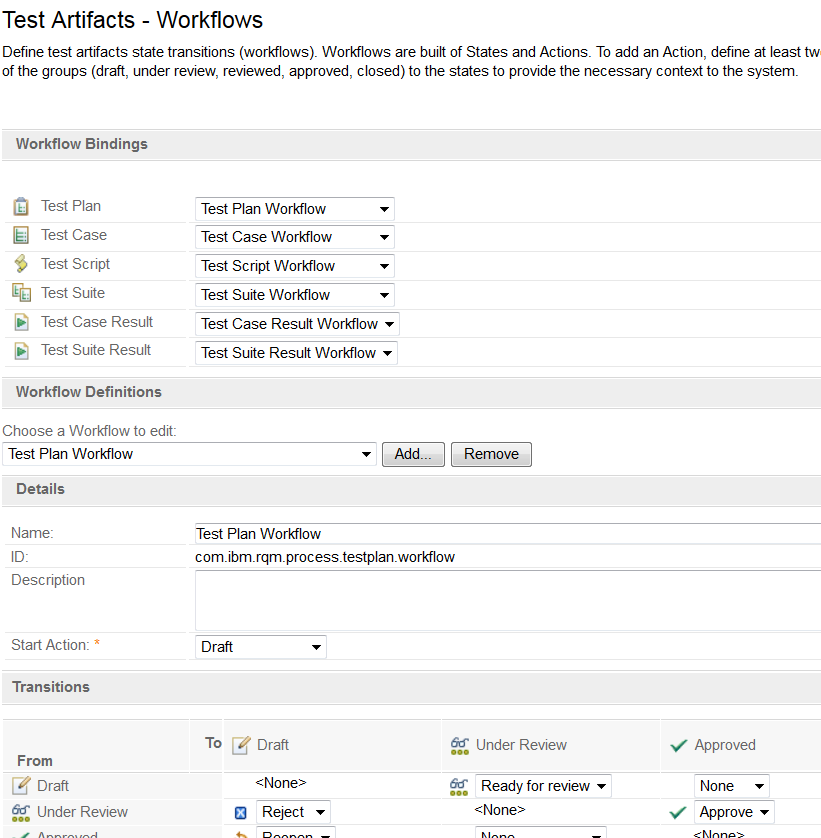 The second item on this menu is the ‘Test Artifacts – Workflows‘ item.
Each of the artifacts has a workflow to take it through stages of Draft, Under Review, Approved etc.
What those stages are, and how you transition from one to the next is controlled here. There are more options associated with workflow control and permissions elsewhere in the menus, but this is the place to start for putting the workflow in the language of your organization.
 The final top level menu is on the dropdown to the right of your name, and is ‘My Preferences for Quality Management‘.
I am only going to look at two items from this menu, but as with the others, there is more to explore. These apply to just you as a user, and to all your QM projects on this server.
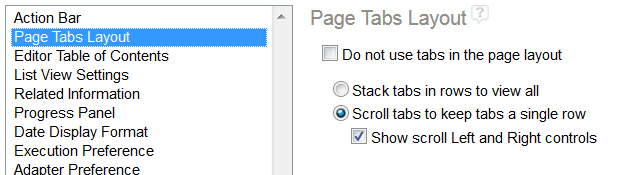 The first item of interest here is the ‘Page Tabs Layout‘. This gives you the options separate tabs for each screen that you have visited, rather like breadcrumbs, but easier to follow. Be sure to close the ones you don’t need any longer, as this can quickly become unmanageable.
 The second item here is ‘Editor Table of Contents‘. By default, the Test Plan, Test Script etc, have a table of contents down the left hand side, and when you select an item, you see just that item. This gives you the option of seeing the whole artifact like a document and the table of contents down the left hand side will take you to the appropriate place in a scrolling document.
How and why you use the different artifacts in Quality Manager has not been considered here, only some of the options for configuring and, mostly, simplifying your project.